MacOS Sonoma Security & Privacy Guide
With the newest macOS Sonoma update, a wide range of new security and privacy features have been introduced. These new features aim to enhance the overall security and privacy of Apple Macs while also providing users with more control over their data.
So, what can you expect, and how can you implement these new features? This guide will provide you with a comprehensive overview of the security and privacy changes in macOS Sonoma and how to utilize them effectively.
Passwords And Passkeys
There may be times when you need to share your Mac password with someone else, such as a family member or colleague. However, texting that information can compromise the security of your device and personal information. With macOS Sonoma, Apple has introduced new passkey features that allow you to create a group and choose which accounts you want to share.
Whenever you make a change to the passwords, they’ll stay up to date in your iCloud Keychain, making it easier than ever to share and update passwords securely.
To enable this on your Mac, follow these steps:
- Click the Apple icon and click on System Settings.
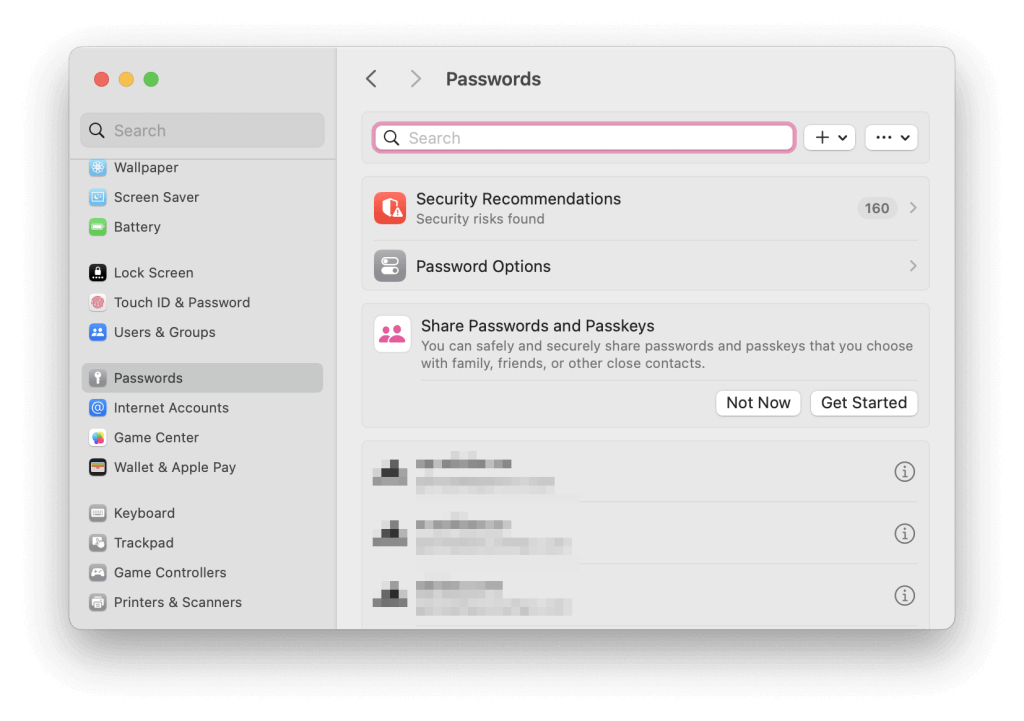
- Click on Passwords.
- Find the banner labeled “Share Passwords and Passkeys” and click on it.
- A screen will pop up explaining the capabilities of this feature. Read through it and click continue.
- Create a group name and add anyone to your group via phone number or e-mail address.
- Once down, click on the “Create” button. You’ll need to make sure that they have the latest updates on their phone in order to invite them to your group.
- From here, you can select what passwords you’d like to share. Once done, click save.
- Use the “+” button to add additional passcodes or people to your group.
Safari Profiles
Browsing the internet can expose your personal information and leave you vulnerable to malicious attacks. Starting with Safari 17, which comes preinstalled on macOS Sonoma, Apple has introduced Safari Profiles, allowing you to create multiple profiles for different browsing purposes. You can have one profile for work-related browsing and another for personal use, keeping your online activities separate.
To set up a new profile, follow these steps:
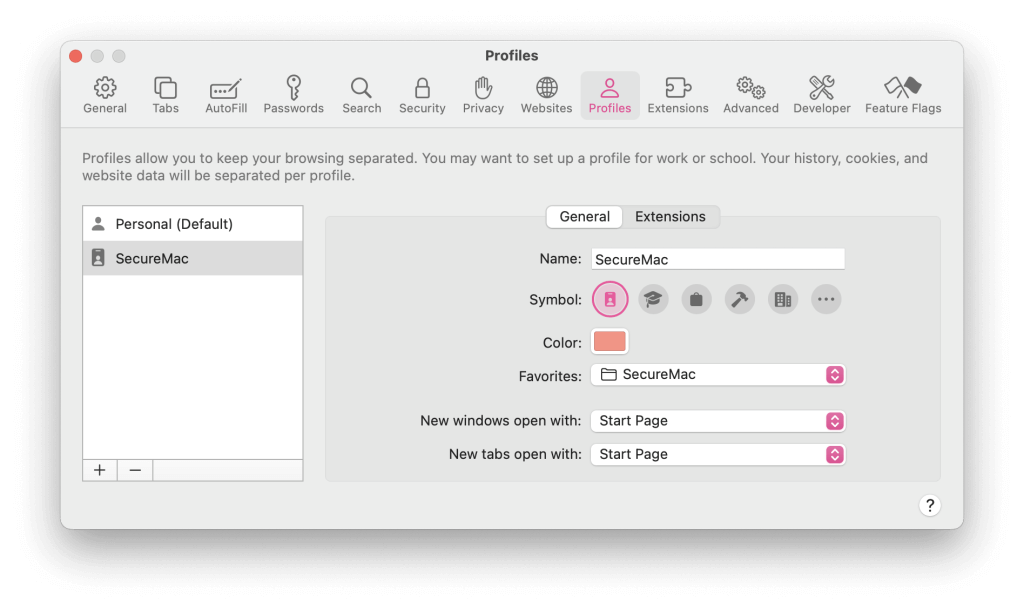
- Open Safari and click on Settings. Then click on Profiles. If it’s your first time using Safari, you’ll be prompted to click on “Start Using Profiles”.
- Click the + button, which is located below the profiles list.
- Choose a name, color, and icon for the profile.
- Once finished, click on the “Create Profile” button.
- Click on extensions to select which ones should apply to this account.
- From there, your profile is created. You can click on the privacy and security tab to set up additional permissions for this profile.
Enhanced Private Browsing
When using Private Browsing, your browsing history and data are not saved on your Mac. However, with macOS Sonoma, this feature has been enhanced to include a new “Trackers Blocked” indicator that allows you to see the number of trackers blocked while in private mode and ensures that no tracking data is collected while browsing.
Additionally, after 8 minutes of inactivity, during screen sharing, or when you lock your Apple Mac, your private browsing window will automatically lock, requiring a password to access them once again.
To enable this feature, follow these steps:
- Open Safari and click on “File”. Then, click on “New Private Window”.
- Once the private window is open, you’re all set! The “Intelligent Tracking Prevention” indicator will appear in the address bar.
Lockdown Mode
Another new feature in macOS Sonoma is Lockdown Mode, which restricts access to sensitive information on your Mac. This mode is for extreme situations in which you may believe that you’re going to be cyberattacked. If you work in a sensitive industry or have highly confidential information on your Mac, this feature can provide an extra layer of protection.
When lockdown mode is enabled, certain features will be blocked, including:
- Messaging: The mode limits attachments to specific types of media and disables certain features like links and link previews.
- FaceTime: Incoming calls are only permitted from contacts you’ve previously interacted with, and features like SharePlay and Live Photos are disabled.
- Web Browsing: Some complex web technologies are blocked, potentially affecting website loading times and operation. Web fonts might not be visible, and some images may not load.
- Photos: Shared location data is excluded when sharing photos, and shared albums are removed from the Photos app, with new invitations being blocked.
- Apple Services: You can only receive invitations from contacts you’ve previously invited.
- Wireless Connectivity: Automatic joining of non-secure Wi-Fi networks is prevented, and 2G cellular support is disabled.
- Device Connections: Devices must be unlocked to establish connections with an accessory or another computer. For Mac laptops with Apple silicon, explicit approval is required.
- Configuration Profiles: The installation of configuration profiles is blocked, and the device cannot be enrolled in Mobile Device Management or device supervision.
To enable Lockdown Mode, follow these steps:
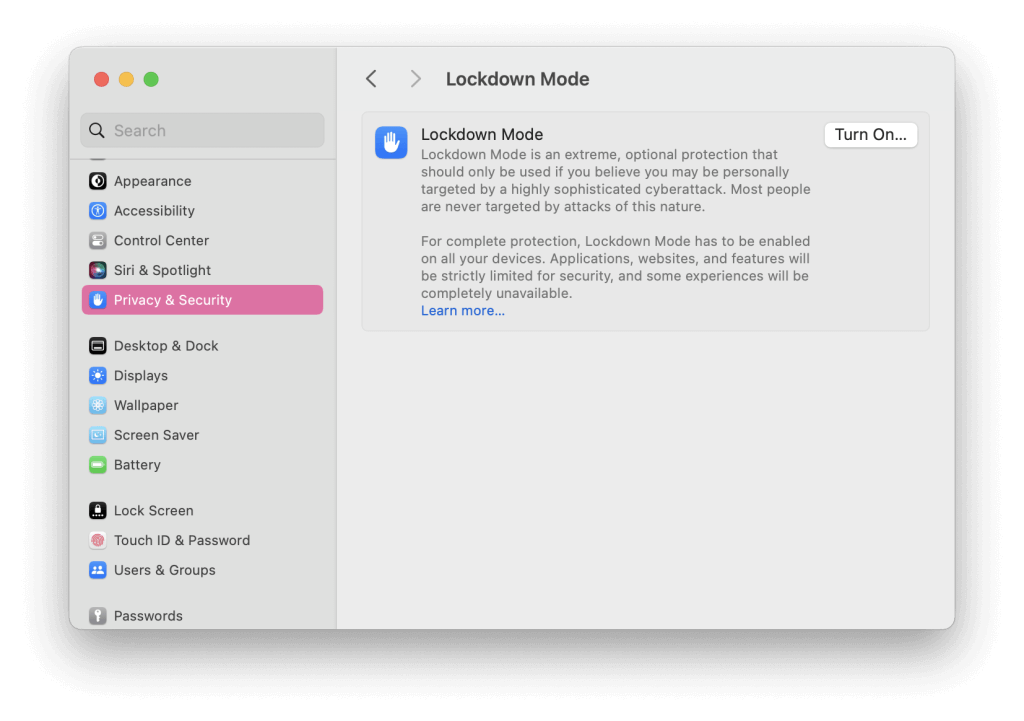
- Click the Apple icon and click on System Settings
- Click on Privacy and Security
- Scroll down until you find Lockdown Mode
- To activate, click the “Turn On” button and enter your password
- Click turn on and restart your Mac
- To deactivate, follow steps 1-3 and click the same button again to turn it off
AirTag Sharing
In the past, sharing your AirTags with family and friends required you to give them your Apple ID credentials. With macOS Sonoma, this is no longer the case. You can now share your AirTag’s location with up to five different people without giving them access to your Apple ID. This can be helpful for families or friends who are traveling together and want to keep track of each other’s belongings, or even if you own a shared item, like a bike or car.
To share your AirTag’s location, follow these steps:
- Open Finder and click on the Find My app
- Click on “Items”
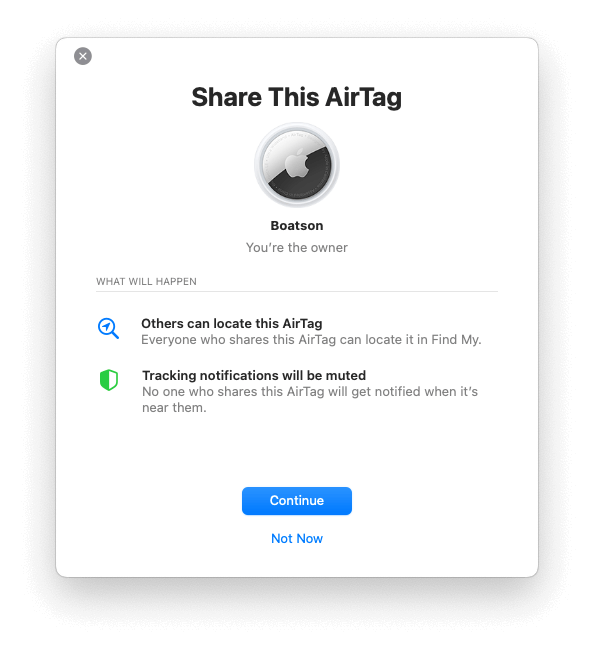
- Select the AirTag you want to share and click on the info button on the map
- Add a person below “Share This AirTag,” and click continue
- Choose who you want to share with, and then click Share on the top right corner
- Once you’ve finished adding everyone to the AirTag, click on the Share button located in the top-right corner of the page
- From there, you’ll be able to see everyone you invited and whether they’ve accepted the invitation or not
Two-Factor Authentication
Two-factor authentication (2FA) adds an extra layer of security to your Apple ID and prevents unauthorized access. With macOS Sonoma, Apple has made it simpler for users to use 2FA on any website. Not only will Safari fill in any code you receive via e-mail or text message, and will delete any messages that contain these sensitive codes after it’s confirmed that you’ve filled this in. You don’t need to follow any specific steps in order to enable this feature; it is automatically available with the newest update.
Communication Safety Features
macOS Sonoma also includes communication safety features to protect you from harassment and unwanted attention. This includes messages, third-party apps, and even phone calls. With this feature, you’ll automatically receive a pop-up on your computer that states, “This could be sensitive. Are you sure you want to view it?” From there, you’ll be able to choose from the options “Not Now”, “I’m Sure,” or “Ways To Get Help.”. There is also an option to turn off the feature entirely.
To enable communication safety features, follow these steps:
- Click the Apple icon and click on System Settings
- Click on Screen Time
- Select the name of the person you want to set up these settings for (this can include yourself)
- Click on Communication Safety
- Turn “Check For Sensitive Photos” on or off to get started. You will need to verify your passcode or Apple ID to make changes
Improved Permissions Feature
The Permissions feature allows you to better control what information and features your apps have access to. With macOS Sonoma, this feature is now more prominent and transparent, allowing users to easily see which apps have requested permission and for what purpose.
To view or change app permissions, follow these steps:
- Click the Apple icon and click on System Settings
- Click on Privacy & Security
- Click on the app you’d like to edit permissions for
- Toggle the chosen option “On” or “Off”
macOS Sonoma 14 brings a variety of new features to help protect your privacy and security on your Mac. In this article, we’ve covered passwords and passkeys, safari profiles, enhanced private browsing, lockdown mode, AirTag sharing, two-factor authentication, communication safety features, and improved permissions features.
Want to learn more about protecting the security and privacy of your Apple devices? Learn more about SecureMac’s products and how we can help you protect your Mac from stalkware, malware, and other internet clutter.