How to use an authenticator app for 2FA on iOS
Two-factor authentication (2FA) can protect you from account takeovers and breaches — and using an authenticator app for 2FA is one of the best things you can do for your personal security.
Unfortunately, many people are wary of authenticator apps, or just don’t know how to use them. Because of this, they rely SMS-based implementations of 2FA — despite the fact that there are significant security issues with SMS.
It doesn’t have to be this way. 2FA authenticator apps are actually reasonably easy to use, once you get the hang of them. In this guide, we’re going to show you how to set up 2FA on iOS using an authenticator app. We’ll cover the following topics:
- Why you should use 2FA
- Security issues with SMS-based 2FA
- Choosing an authenticator app
- How to install Authy on iOS
- How to add accounts in Authy
- Walkthrough 1: Setting up an authenticator app for 2FA on a Google or Gmail account
- Walkthrough 2: Setting up an authenticator app for 2FA on a LinkedIn account
- Backups and recovery codes
- What if a site doesn’t let me use an authenticator app for 2FA?
- What if I’m not ready for app-based 2FA?
Why you should use 2FA
We’ve covered the benefits of 2FA before, so what follows will only be a quick refresher. (If you want a full intro to 2FA, listen to Checklist 139: 2FA 101.)
When you use 2FA, you need to provide two authentication factors in order to log into an account, website, or service. That usually means that you will enter your password as your first authentication factor — but then you’ll also have to enter a one-time authentication code sent to your mobile device. You have to provide both the password and the authentication code to log in.
Here’s how that keeps you safe. Let’s say that a bad guy manages to steal your password. This can happen in a number of ways: data breaches, phishing emails, keylogger or malware infections, social engineering attacks and seasonal scams.
OK, so a bad guy has your password. If you don’t have 2FA enabled, that’s pretty much game over. They can enter your password, log into your account, and do whatever they want to do.
But here’s the thing. If you do have 2FA set up, the bad guy will still have to enter the second authentication factor: that one-time code sent to your mobile device. And since the device is with you, and not the bad guy, they aren’t going to be able to log into your account — even though they have your password!
Security issues with SMS-based 2FA
Two-factor authentication is an excellent way to prevent account takeovers and breaches. But many implementations of 2FA have a pretty big security issue.
The problem is that 2FA often relies on SMS messages to send those one-time authentication codes. And SMS is no longer considered a secure data transfer protocol.
For one thing, the SMS protocol itself is vulnerable to certain kinds of interference and manipulation by bad actors. That’s one of the reasons that Google has tried to develop a more secure alternative to SMS.
But there’s an even more basic security issue with using SMS for 2FA: SIM swapping attacks. In a SIM swapping attack, a bad actor attempts to reassign someone else’s mobile number to a SIM card that they control. If successful, the attacker will start receiving all of their victim’s calls and text messages — including their 2FA authentication codes. This is how 2FA-protected accounts can still be compromised by bad actors.
Due to the limitations of SMS, authenticator app-based 2FA is considered much more secure. Authenticator apps don’t use SMS at all. Instead, they generate something called a “time-based one-time passcode” (TOTP). They do this entirely in-app, meaning that the code is generated on your actual device, not on some company’s server — so it doesn’t have to be sent to you. Even if a bad actor managed to get hold of your password and redirect your SMS messages to their own device, they still wouldn’t be able to get your app-based 2FA codes, because those codes live exclusively on your mobile device.
How to pick an authenticator app
There are several good options for authenticator apps on iOS. Microsoft makes a popular and well-reviewed 2FA app that you can get for free in the App Store. Google Authenticator is another widely used authenticator app, although on iOS, some users have reported issues with functionality and support.
As with any app, do your due diligence when choosing an authenticator app. At a minimum, this means reading customer reviews and the app’s privacy “nutrition label” before installing.
One of the best authenticator apps around is Authy, and that’s the one we’re going to use in the examples below. If you prefer to use a different option, that’s fine too — we’ve chosen Authy because a.) we like it and b.) the app has a large number of satisfied iOS users.
How to install Authy on iOS
Go to Authy’s page in the App Store and download the app onto your iOS device. Once the app has finished downloading onto your device, launch it for the first time.
Enter your phone number in international format and provide an email address. This links your Authy account to your phone number and device, and it gives Authy a way to contact you if you need to verify account changes or go through the account recovery process.
Verify your number and device with an SMS message or phone call. Authy will send you a registration code to make sure that you are the owner of the device.
Before you can start protecting your accounts with app-based 2FA, you have to install an authenticator app on your mobile device. Here’s how to install Authy on iOS:
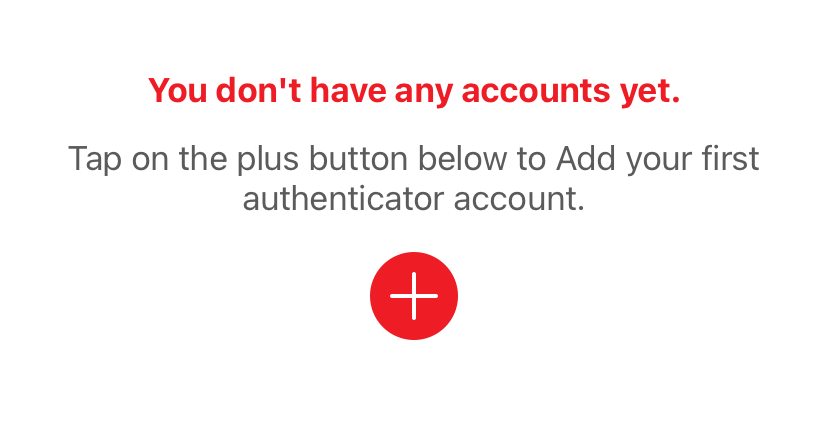
How add accounts in Authy
Now you have the Authy app installed on your device, and you’ve linked the app to your mobile number and device. The next step is to begin turning on authenticator app-based 2FA for your accounts. This is where we come to the “good news/bad news” part of the process.
First the “bad news” (though it’s really not all that bad). When using an authenticator app, you’ll have to enable 2FA for each of your accounts individually, and the procedure will vary between accounts. In other words, it will take some time, and you may have to do a little troubleshooting.
So what’s the good news? First of all, you don’t have to do this all at once. In fact, we’d recommend that you take things slowly at first. Add one or two main accounts in your authenticator app until you get the feel of it, and until you get comfortable using it.
After that, you can begin turning on authenticator app-based 2FA for all of your other accounts. Remember, this doesn’t have to be a race, and it shouldn’t feel like a chore. Just add an account here or there until you’re covered. Keep in mind that with every account you add, you’ve made yourself more secure than you were before. In other words, every little bit that you do is an automatic win!
There’s more good news, as well: You don’t have to go it alone. The people who make authenticator apps understand that it can be confusing to figure out how to turn on 2FA for all of your different accounts, because the process isn’t always the same. For this reason, they will often create step-by-step setup guides for different account types. Authy, for example, has an extensive series of guides on their website. In what follows, we’re going to show you how to enable 2FA using Authy for Google and LinkedIn accounts.
Setting up an authenticator app for 2FA on a Google or Gmail account
On your computer, log into your Google or Gmail account and go to the account settings area. You can find this by clicking on the account icon, and then on Manage your Google Account.
Go to the Security section and click on 2-Step Verification. Click on Get Started and re-enter your Google password if prompted so that you can make changes.
Enter your phone number and type in verification code that you receive via SMS. Note that it’s common to have to do this before being allowed to turn on app-based 2FA for an account. Confirm that you want to enable 2FA by clicking Turn On.
Now you can turn on authenticator app-based 2FA. From the same section in your account settings, scroll down until you see an option to use the Authenticator app. Click on Set Up. Note that Authenticator is Google’s own 2FA app, which is why it’s presented as the default choice. However, you can simply substitute Authy for Google Authenticator in the following steps.
Tell Google what kind of phone you have (Android or iPhone) and click Next. At this point, you’ll see a QR code and the words Set up Authenticator. This is where you’re going to just use Authy instead of Google Authenticator. From the Authy app on your iOS device, click the Add Account button. This will pull up Authy’s QR code scanner. Click on Scan QR Code and then scan the QR code on your computer screen. (Note that you’ll have to give Authy camera access so that the QR code scanner will function.)
You may be asked to turn on encrypted account backups at this stage. We’ll talk more about that in another section of this guide, so you can either read that now or skip over this step for the moment.
If the QR scan is successful, you’ll see a screen where you can change the default Google logo image and give the account a nickname in Authy. You can just leave this as is, but it can be useful to give different Authy-protected accounts nicknames if you have multiple accounts. This is completely optional, but if you have e.g. four different Google accounts, it can help you keep track of everything. Click Save when you’re happy with the logo and account nickname.
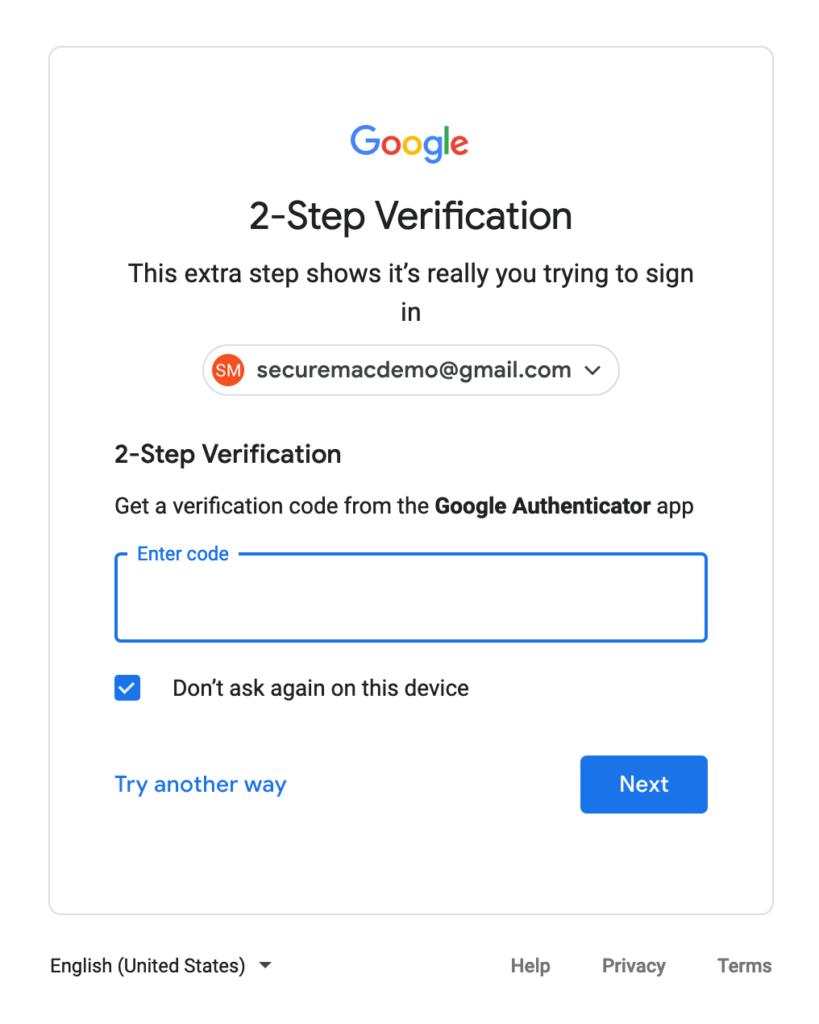
Almost done! Now click Next under the QR code on your screen. You’ll see an entry field with a place to enter a 6-digit code. On your iOS device, you’ll see a 6-digit code with a 30-second countdown clock. Enter the code that you see on your device into the verification field on your computer, and click Verify.
All done! From now on, whenever you log into your Google or Gmail account, you’ll have to provide a time-based 2FA code after you enter your password. You can find these codes by opening up the Authy app and clicking on the Google account in the app. You’ll see a 6-digit code and the little 30-second countdown clock. Just enter the current code in the Authy app into the 2FA field on the Google login page, and you’re in!
Setting up an authenticator app for 2FA on a LinkedIn account
On your computer, log in to your LinkedIn account. Go to your account settings area. You can find this by clicking on your profile picture in the top right and then clicking on Settings & Privacy in the dropdown menu. Click on Sign in & security, click on Two-step verification, and finally, click on the words Turn on.
From the dropdown menu that says Choose your verification method, select Authenticator App and then click Continue. Note that you may have to enter your account password again to make the change.
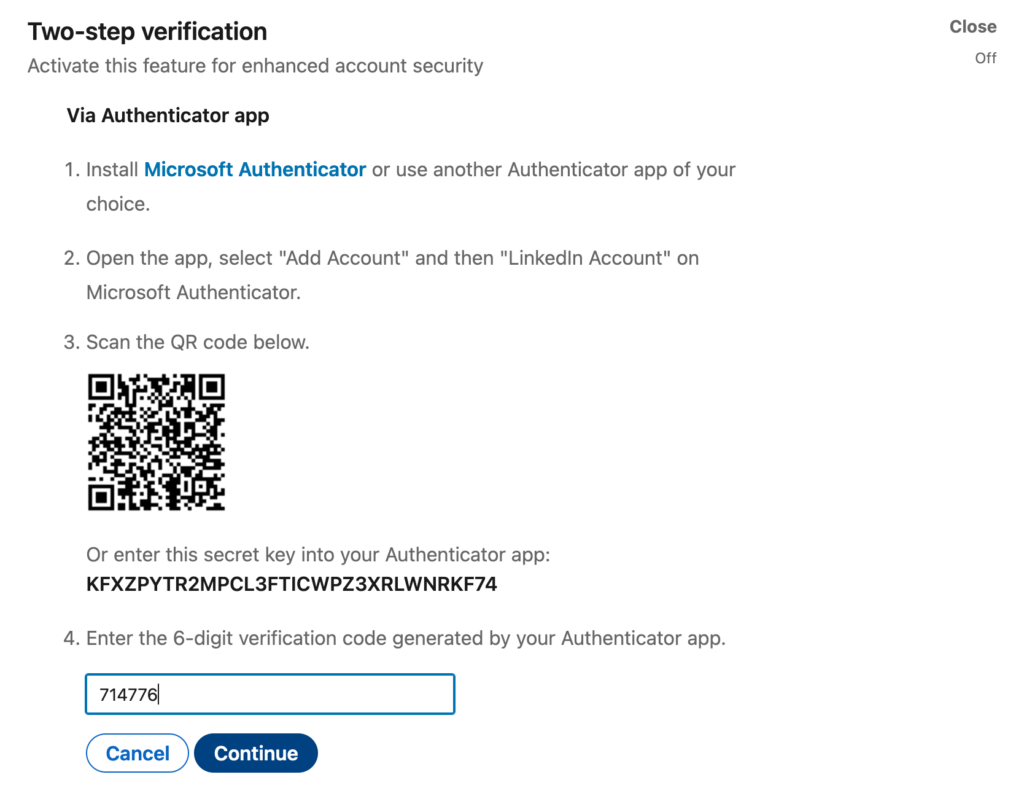
At this point, you should see a screen with instructions and QR code. You’ll notice that LinkedIn suggests installing Microsoft Authenticator — no surprise, because Microsoft owns LinkedIn! As with your Google account, you can just ignore that and use Authy to scan the QR code instead.
On your iOS device, launch the Authy app and click Add Account. Click Scan QR Code to pull up Authy’s QR code scanner, and then scan the QR code on your computer screen to add your LinkedIn account to Authy. At this point, you can change the logo that will appear in your list of accounts in Authy, and you can change the nickname for the account. You can also just go with the defaults, it’s up to you. When you’re ready, click Save.
Now you’ll see that 6-digit code and a 30-second countdown on your iOS device. Enter the code into the field underneath the QR code in your LinkedIn account settings area, and click Continue.
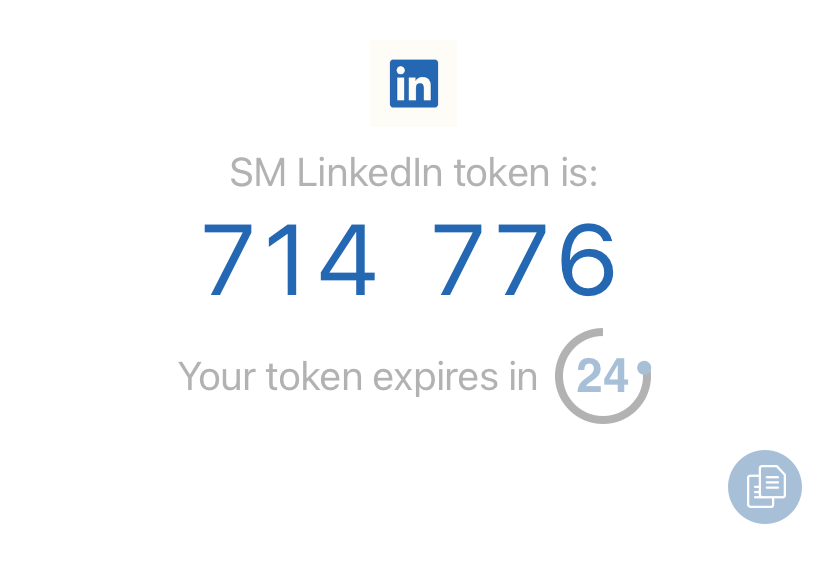
From now on, whenever you log into your LinkedIn account, you’ll have to supply the time-based one-time passcode (TOTP) as well. Again, to find this, just open up the Authy app and click on your LinkedIn account. You’ll see one of those 6-digit codes and the little countdown clock. Just enter the current code in the prompt field on the LinkedIn website and you’re in!
Backups and recovery codes
App-based 2FA is a great way to protect yourself — and if you’ve followed the walkthroughs above, you’re probably beginning to see how easy it is to use.
But there’s still a nagging question that stops many people from turning on 2FA for their accounts. What happens if you lose your second authentication factor? You clearly don’t want to be locked out of all of your accounts forever — and the thought of that happening puts some people off of 2FA altogether. (For a full discussion of this worst-case 2FA scenario, see Checklist 160: What If You Lose One Factor?)
It’s a valid concern, because it’s pretty easy to lose access to your mobile device. You might damage or misplace it; it could be stolen; or you might simply buy a new phone without remembering to back up everything on the old device!
Nevertheless, the potential loss of a mobile device is not a good reason to miss out on the protection that 2FA offers. The developers of authenticator apps have already taken this possibly into consideration, and there are a few easy steps you can take to make sure you never get locked out of your accounts — even if you lose your 2FA device:
Print out your 2FA recovery codes
Nearly all websites that offer 2FA also allow you to generate 2FA recovery codes. The codes can be used to log into your account if you don’t have access to your 2FA device. You can typically find these codes in the same account settings area that you used to enable 2FA in the first place.
Every time you set up an account with 2FA, generate some recovery codes and keep them somewhere safe. That means physically printing them out and putting them in a secure location, or storing them in some encrypted format, for example using the Secure Note feature in Keychain or in your password manager.
Back up Authy in the cloud
Authy lets you back up your 2FA accounts in the cloud. This lets you restore your Authy accounts quickly and easily if you have to reinstall the Authy app on a new device. The data is stored in encrypted format, so you’ll need to set up a password for your backups. To do this, go to the Accounts area in the Authy app, and toggle on Authenticator Backups. Be sure to use a strong password — and whatever you do, don’t lose that password! Keep a copy of that backup password somewhere safe (a bank safety deposit box or a home safe is ideal).
Create a backup device
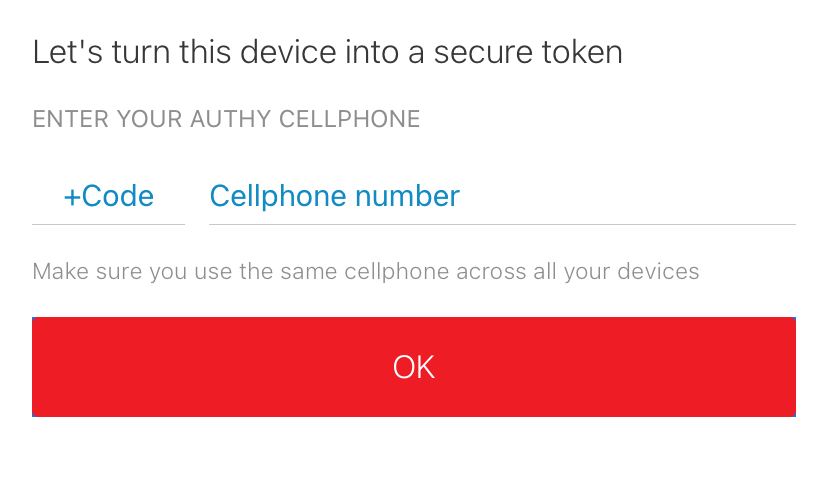
If you have a second mobile device, Authy recommends setting it up as a backup 2FA device. (You can also use their desktop app if you want to use your computer up as your backup). To create the backup device, install the Authy app on the second device. Use the phone number from your first device when you see the prompt to enter your “Authy cellphone”. That lets Authy know that both devices belong to the same user. You can verify the new device via SMS, phone call, or by using your first Authy device to authenticate the second one.
All of your Authy accounts will be loaded onto the backup device, and the two devices will automatically be synced. Once you’ve set up a second device, Authy recommends disabling the app’s multi-device option by going to Devices > Allow Multi-device and toggling the switch to off. This ensures that only your two authorized devices will function with your Authy account. If anyone else tries to install the Authy app on their device and use your phone number to add a new device, they won’t even be allowed to get to the verification stage.
What if an account doesn’t let me use an authenticator app for 2FA?
Most companies are on board with 2FA, since they recognize that it can help protect their users. Authenticator app-based 2FA is increasingly common, but there are still some companies that only offer 2FA via SMS or their own proprietary implementations.
If you find that you can’t set up 2FA for an account or service using your favorite authenticator app, here’s what you can do:
First of all, bug them about it! Open a support ticket, write to their customer service group, fill out a feedback survey, or call them out about it on social media. You obviously want to be polite about this — remember what your mom used to say about catching more flies with honey. But be clear about your expectations as a user or customer, and let them know that you want to be able to protect yourself with your preferred authenticator app.
It helps to remember that companies are made up of different working groups, and that (alas!) the security teams aren’t usually the ones calling the shots. To be frank, some tech person at the company has probably already told management that they should implement app-based 2FA, but to no avail. Direct feedback is one of the best ways to let the decision makers know that the demand is coming from the customers themselves (and that they should really listen to their security teams!).
In addition, remember that imperfect security is better than no security at all. If you can’t use app-based 2FA for some of your accounts, don’t stress out about it — just use the SMS version for those sites. Yes, it’s not ideal. But it’s far better than not using any 2FA at all.
And what about those companies that still don’t offer any form of 2FA at all? Well, for one thing, they really should … and you have every right to let them know they’re behind the times! But while they’ll hopefully improve their security in the future, what can you do to stay safe in the meantime? In this situation, the thing to do is really emphasize other best practices for account security: use a strong, unique password, be on the lookout for phishing or social engineering attempts, and sign up for data breach notifications.
What if I’m not ready for app-based 2FA?
Some people try out an authenticator app for 2FA and … well, let’s just say they don’t love it. They find it hard to use, they think the setup is confusing, or they simply prefer the familiarity of SMS-based 2FA.
In addition, there are those people who have no problem using authenticator apps themselves — but who don’t like them when it comes to helping their less tech-savvy friends and relatives stay safe.
Here’s the thing about cybersecurity: It’s not an all or nothing proposition. In fact, we’d go as far as to say that there is no such thing as “perfect” security — only relative degrees of risk.
If you want to use SMS-based 2FA, or if you want to set someone else up with it, go right ahead! Yes, it’s not quite as secure as app-based 2FA — but it’s far, far better than no 2FA at all. As with all things, it’s important not to let the perfect become the enemy of the good.
Do you want to learn more about improving your digital security and privacy? Check out one of our other guides or how-to articles:
- SecureMac’s guide to VPNs for Mac users
- How to set up a new Mac for security
- Setting up a new iPhone for privacy
- How to make encrypted iMessage backups
- Avoiding scam apps in the App Store