Setting up a new Mac for security: 7 tips and tricks
So you’re the proud owner of a brand new Mac — wonderful!
You’re no doubt eager to try out all the bells and whistles; install your favorite apps; start using your new machine. We know the feeling.
But part of setting up a new macOS device should always be making sure it’s secure — and that’s what we’re going to cover in this quick setup guide. Follow these “Day 1” steps so you can enjoy your Mac with confidence in the weeks, months, and years to come.
- 1
Enable automatic updates
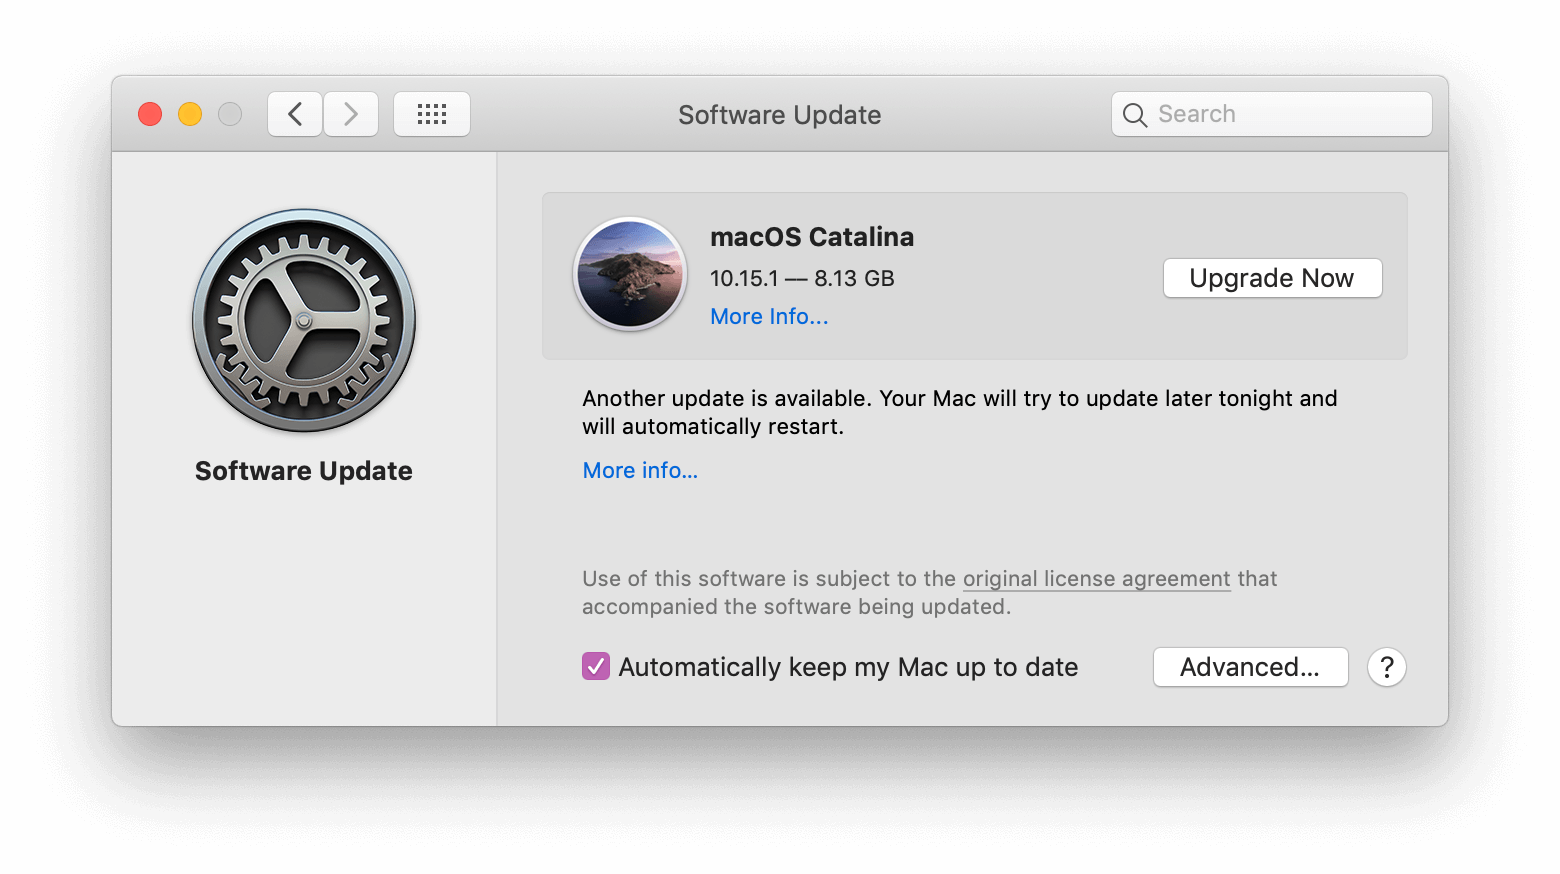
Apple pours billions of dollars into keeping macOS safe — and a big part of that work is regularly patching vulnerabilities and releasing OS updates to users. But those patches won’t help you if you haven’t updated your system, and many users either forget to do this or procrastinate a bit. Enabling automatic updates for macOS on day one means you’ll never have to think about this again, and you’ll always be protected.
In macOS Mojave or Catalina, start at the Apple menu and go to System Preferences > Software Update. Check Automatically keep my Mac up to date — and note that doing this will automatically update all of your apps, not just your OS. If you’d like a little more granular control over your updates, you can see your options by clicking Advanced.
- 2
Use FileVault
Generally speaking, macOS is a well-secured platform. But Apple’s engineers can’t help you if someone gains physical access to your device — and every once in a while, researchers discover a vulnerability which could expose your files to bad actors.
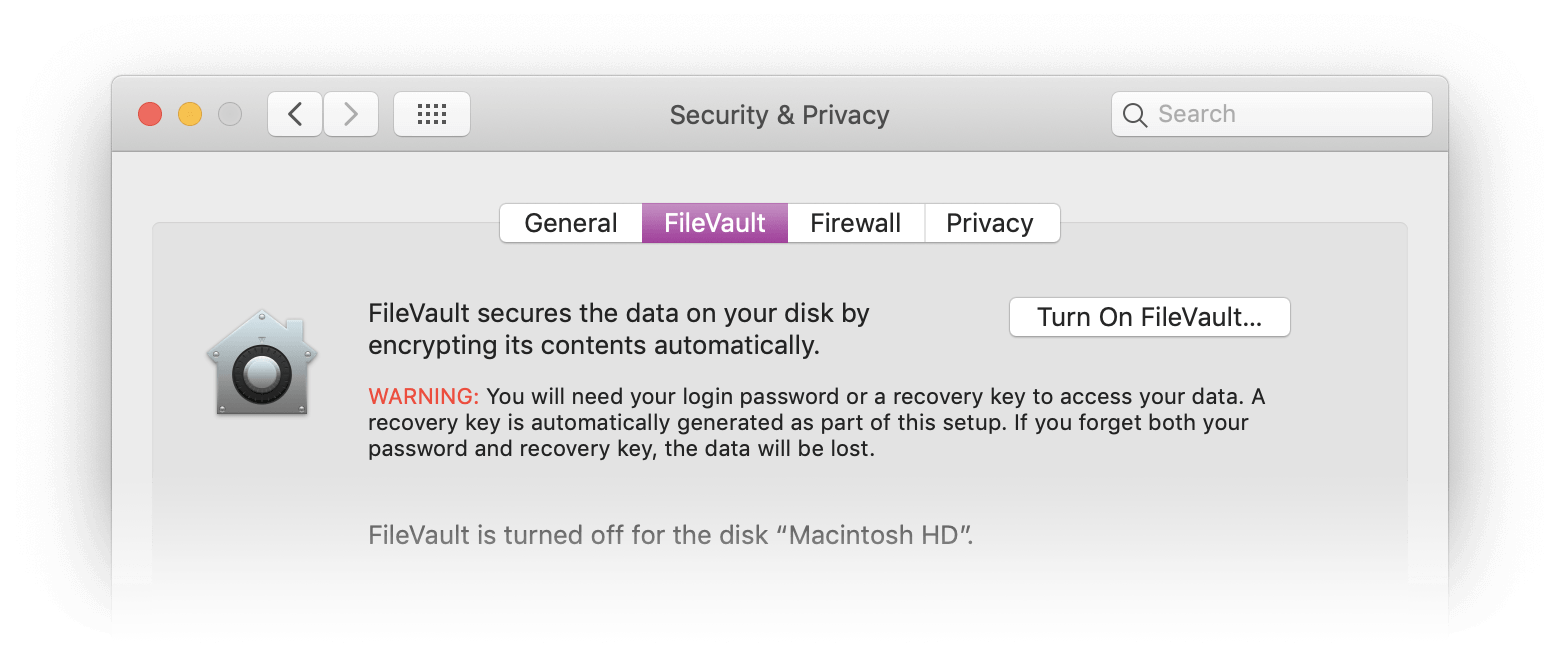
FileVault does two things. First, it encrypts the contents of your Mac. Second, it requires an account password to log in each time you start your computer. Once you enable it, FileVault will run in the background, encrypting all new files as they’re added to your system.
To turn on FileVault, go to the Apple menu, then head to System Preferences > Security & Privacy. Click on the FileVault tab and then on the lock icon. At this point, you’ll be prompted to enter your administrator name and password. Do this, and then click Turn On FileVault.
- 3
Require a password after inactivity
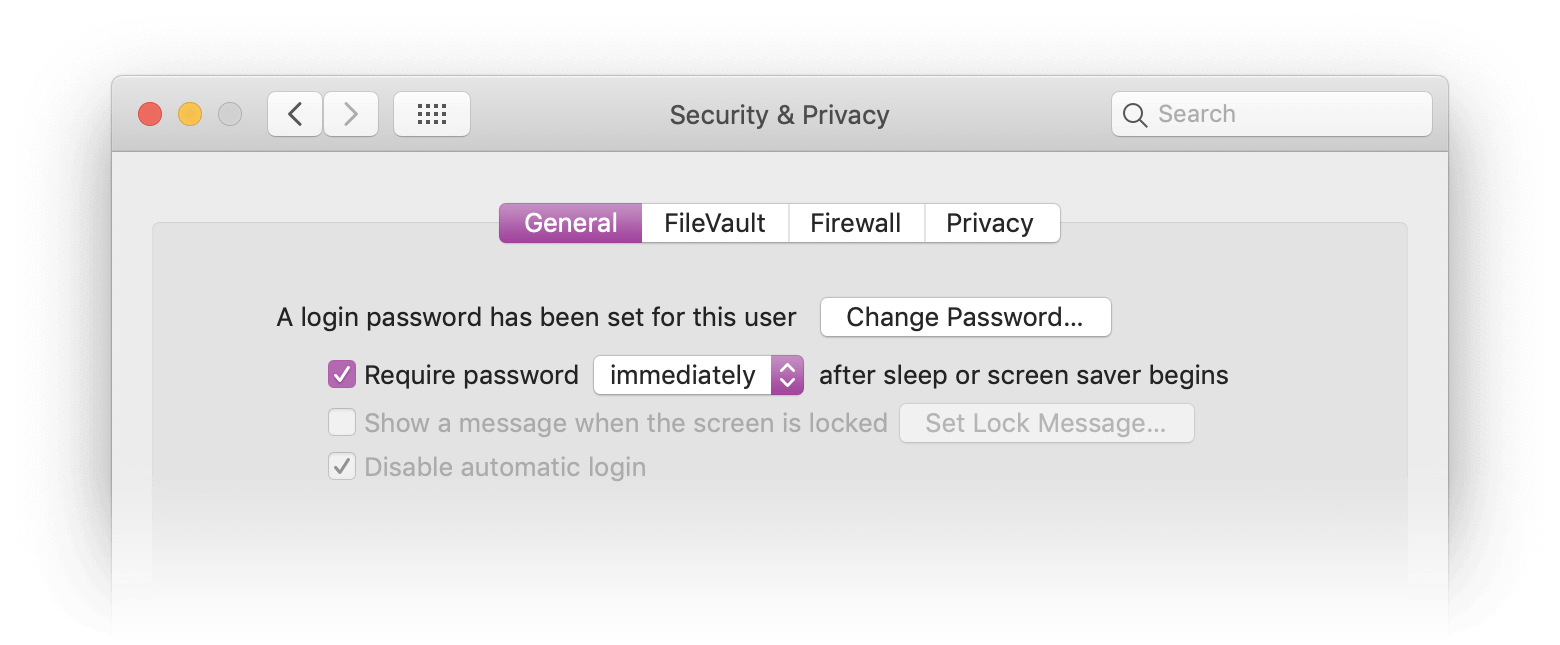
FileVault will require a password at startup, but it’s best to have your Mac require a password each and every time it wakes from sleep or comes out of screen saver mode.
To do this, start at the Apple menu, then head to System Preferences > Security & Privacy > General. You’ll see an option to Require a password … after sleep or screen saver begins. Select this option and then use the pop-up menu to decide how long your Mac can be in sleep or screen saver mode before you’ll need to enter the password to re-access the machine. Keep this short — a few seconds is best.
- 4
Set up Hot Corners
Screen savers activate automatically after a predetermined period of inactivity. But what if you need to walk away from your machine quickly and don’t want to wait?
With Hot Corners, you can create a shortcut which will allow you to activate your screen saver instantly by moving your mouse pointer to the corner of your screen.
To do this, head once again to the Apple menu, and then System Preferences > Desktop & Screen Saver > Screen Saver > Hot Corners. A pop-up menu will appear which will allow you to select which corner of the screen you want to use, and then define the action that you want performed when the pointer is moved to that corner. Choose your corner, and then select Start Screen Saver from the list of possible actions.
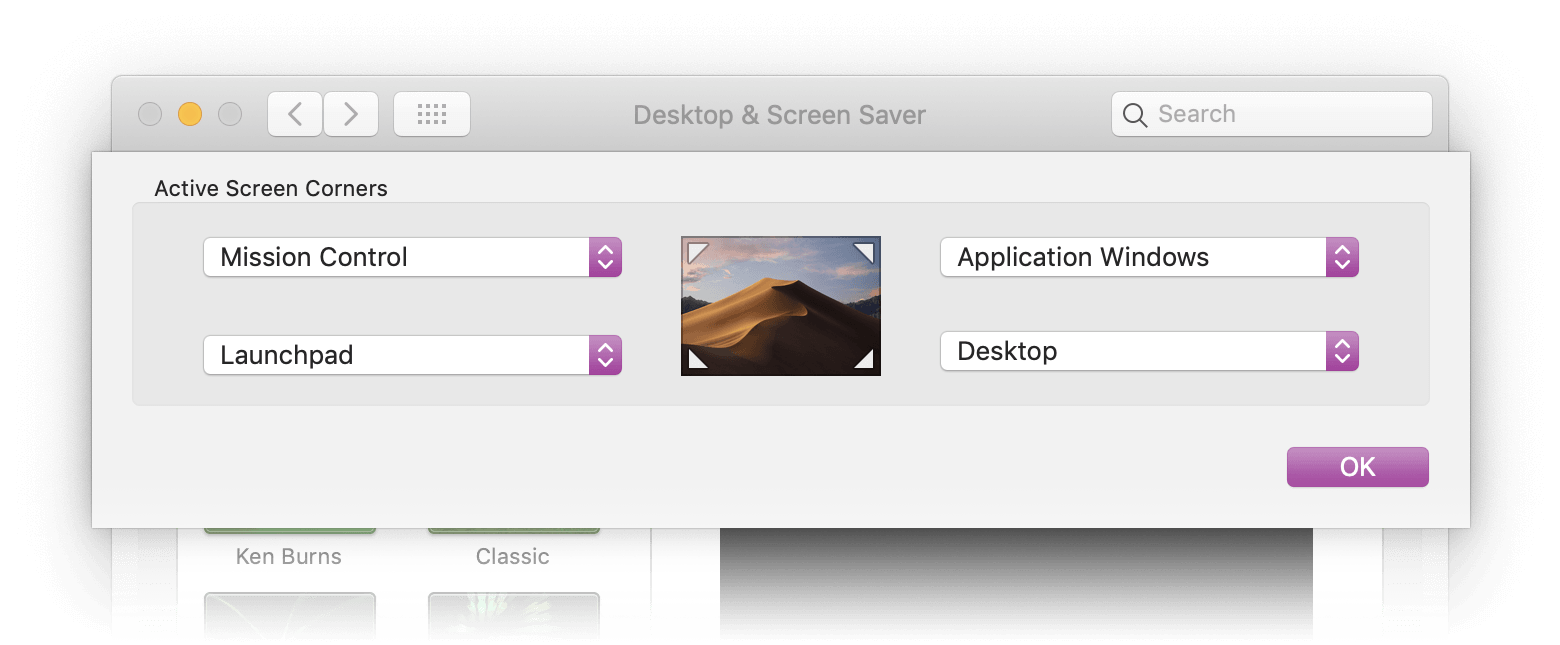
From now on, whenever you move your pointer to that corner, the screen saver will start right away — and if you followed the previous suggestion, a password will be required to re-access your Mac.
Of course, you should always use Hot Corners in combination with a password-protected screen saver which is set to activate after a few moments of inactivity — that way, if you forget to use Hot Corners, your computer will still be protected automatically after a few minutes.
- 5
Turn on “Find My” for macOS
In macOS Catalina and iOS 13, the Find My iPhone and Find My Friends apps have been combined into a single, new app called “Find My”. The Find My app allows you to locate a lost or stolen Mac — even when it’s offline.
To enable Find My in Catalina, first make sure Location Services is available for the Find My app to use. You can do this by going to the Apple menu and then System Preferences > Security & Privacy > Privacy. From here, select Location Services and check the box for “Enable Location Services”. You’ll see a list of apps which can use Location Services, so just make sure the box for Find My is selected here.
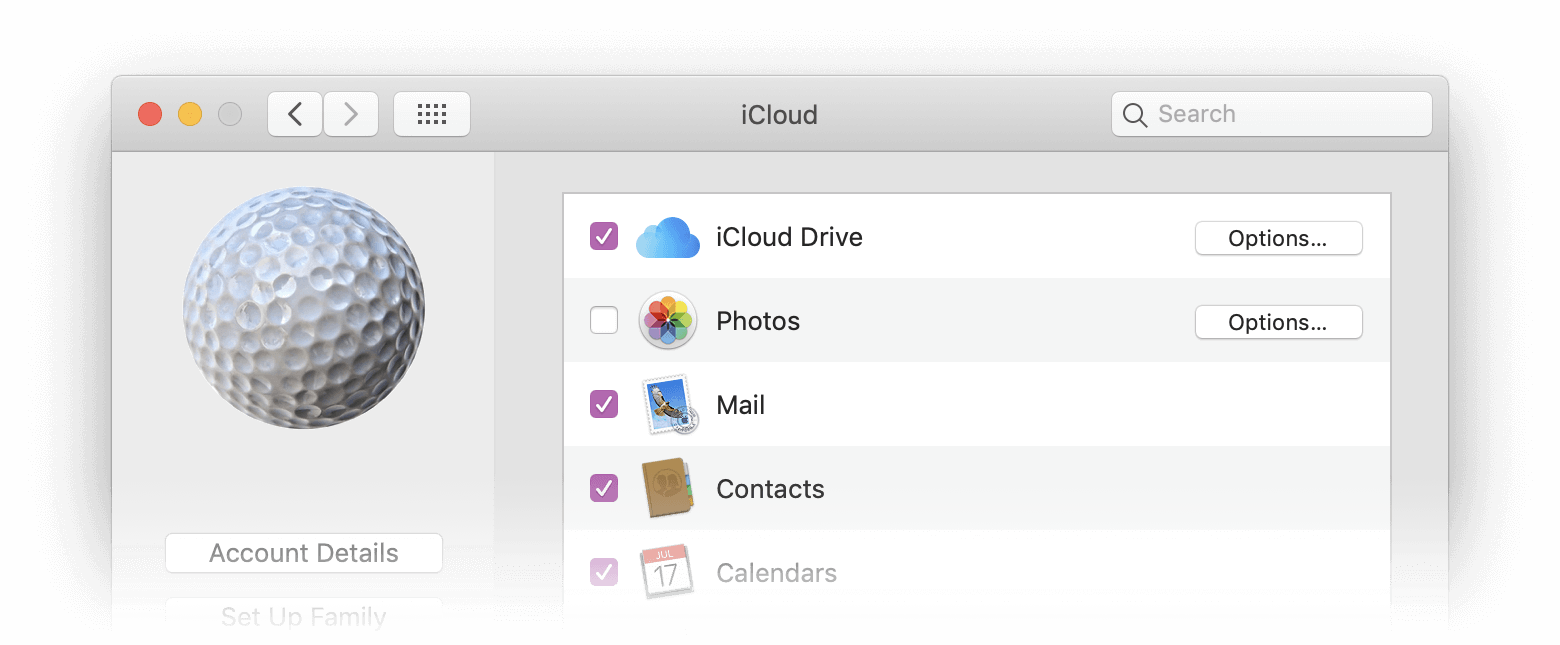
Once you’ve done this, it’s time to actually turn on Find My. Starting at the Apple menu again, go to System Preferences > Apple ID > iCloud. Here you’ll see another list of apps: Check the box next to Find My Mac to enable Find My for your macOS machine. If you click on Options, you’ll be able to turn on Enable Offline Finding, so your machine can be found even if it’s not connected to the Internet.
If the unthinkable happens and your Mac goes missing, you can now use the Find My app to locate the machine or even mark it as lost and remotely lock it down.
- 6
Back up with iCloud and Time Machine
Stuff happens. Operating systems crash, phones get dropped, toddlers decide to give the family MacBook a bath. Ransomware is also a danger, as this type of malware can encrypt your files or lock you out of your system, rendering your computer useless.
That’s why having a backup system in place is an essential part of cybersecurity and digital risk management. There are some great third-party backup services out there, but Apple’s two native backup solutions, iCloud and Time Machine, already provide a robust, built-in backup system for Mac users.
iCloud Drive provides you with secure, cloud-based storage for your documents. The first 5GB is free (though that’s the total allotment for all iCloud storage space, which may also include use by other apps and services). If you need more space, though, it’s pretty cost-effective: 2TB of storage only costs $9.99 per month.
Documents stored in iCloud Drive can be accessed from any of your devices, and can be synced across multiple devices. Since these documents are not stored on your actual, physical Mac, then if something does happen to your machine, you will still be able to access your files.
Turning on iCloud Drive on a Mac is pretty simple: Start at the Apple menu and then go to System Preferences > Apple ID > iCloud > iCloud Drive. Check the box next to iCloud Drive, and then click Options to select Desktop & Documents Folders so that the contents of these directories will be automatically added to your iCloud Drive.
Time Machine provides an even more comprehensive backup functionality. It lets you create full backups of all files (including system files), so that if your Mac is ever damaged, lost, erased, or encrypted by ransomware, you’ll be able to restore your system from a backup.
Time Machine backup files are stored on an external device which is connected to your Mac. Once you connect your storage device, you have to designate it as the “backup disk” for your Mac. You may be automatically offered this option when you connect the storage device, but if not, just go to the Apple menu, and then to System Preferences > Time Machine. There you should see an option to choose your backup disk: Click on this, find your external device on the list of options, and select it.
Time Machine will now create backups automatically, keeping hourly backups for the past 24 hours, daily backups for the past month, and weekly backups for previous months. When your storage device is full, Time Machine will automatically delete the oldest backups in order to make space for the new ones. Remember that certain types of ransomware can lie dormant before activating, so it can pay to keep older backups around for a while (since newer backups may still contain the malware). Allow Time Machine to keep old backups around as long as possible, and make sure that your backup drive has ample storage space for as many backup files as possible.
- 7
Install a good anti-virus (and use it properly)
Gone are the days when Mac users could safely assume that “Macs just don’t get viruses”. In fact, researchers are now seeing a spike in macOS malware — which is why running a reputable, regularly-updated antivirus product is an essential part of Mac security these days.
If you’re already a MacScan 3 user, or if you have a multi-computer license, you should be able to download a copy of the app to install on your new Mac, and just use your existing license key to activate it. To do this, you should first deactivate your copy of MacScan 3 on your old machine before installing the app on your new Mac. But if you aren’t able to do this for whatever reason, you can just email us directly and we can help you reset your license key activations so the old key will work on your new machine. If you haven’t tried MacScan 3, you can download a 30-day free trial by clicking here.
Whether you’re using our own MacScan 3 or another antivirus solution, it’s important to remember that these products can only protect you if you’re receiving regular malware definition updates — and performing regular scans. So make sure to enable your software’s automatic update features, and to schedule regular system scans for whatever time you find most convenient.
If you’ve done all of the above, you’re going to be in very good cybersecurity shape relative to the majority of Mac users (and the majority of computer users, honestly). If you take an hour or so to lay the groundwork for macOS security on the first day, you’ll be able to enjoy your Mac worry-free for years to come.