
macOS vs Windows security features
A guide for new Mac owners
Moving from Windows to Mac? Not sure how to use macOS security features and settings?
Not to worry. It’s true that macOS is a little different from Windows, but security essentials are pretty universal. We’ll show you how to stay as safe on your Mac as you did on your PC — and maybe even safer!
Note for New-to-Mac users: When making changes on a macOS, especially to the kind of important security settings we’ll be talking about in this article, you often have to click on the lock icon in the lower-left of the System Preferences panel and enter your admin password before your Mac will let you do anything. Nine times out of ten, when you’re trying to change a macOS system setting and you seem to be stuck, this is what’s happening!
Creating a Standard User
If you’re coming from Windows to macOS, then you already understand the basic concept of different user accounts on a computer having different privilege levels. On a Windows machine, this is handled through User Account Control (UAC) and special commands like Run as Administrator.
On macOS, the account you create during setup will be an administrator account. A lot of Mac users simply use this account as their daily driver — but for security reasons, we don’t recommend this (and neither does Apple!).
The reason is that on macOS, processes inherit the permissions and resources of the user account that launched them. And if you run into some Mac malware, it will be far more powerful if it’s running from an administrator account than it would be on a standard user account.
It’s very easy to set up a new standard user account on macOS:
Start by going to Apple menu > System Preferences > Users & Groups. Click the lock icon and enter your password to make changes.
In the bottom left of the panel, you’ll see a little “+” symbol. Click this to add a new user.
Now you’ll be asked what type of account you want to create. Choose Standard from the pull-down menu, enter the name for the account, and create a unique password for the new user. Then click Create User and you’re done!
From now on, log in from your standard user account for day-to-day activities, and only use your admin account for true admin activities.

Automatic Updates
If you’ve been using Windows, you may have had some bad experiences with updating software. It’s not a dig at Microsoft, but let’s be honest: unpredictable and time-consuming updates are a common complaint among Windows users.
Ready for some good news? On macOS, updates are relatively painless — and ever since macOS Big Sur, a lot of the update process happens in the background while you work. For this reason, on a Mac, automatic updates are the best choice for security and for convenience.
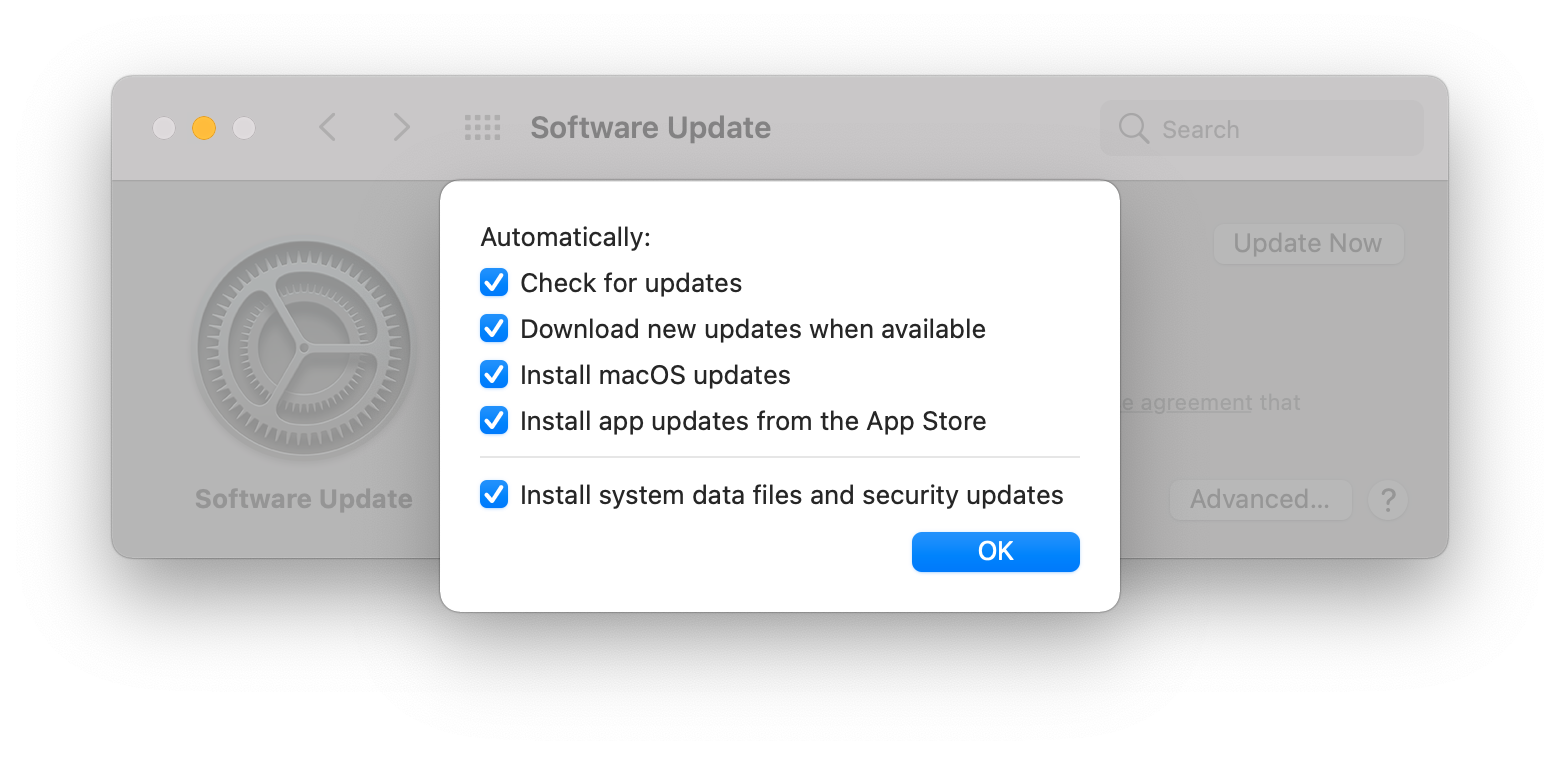
To set up automatic updates on your Mac, go to Apple menu > System Preferences > Software Update. Check the box next to Automatically keep my Mac up to date to enable automatic updates.
You can customize the way your Mac updates its software by clicking on the Advanced button. There you’ll see options to fine-tune the update process. For example, you might want to tell your Mac to check for and download new updates automatically, but only fully install them when you say so.
For most users, we’d recommend checking all of these boxes in order to make sure you’re never running unpatched software. It will keep you safe — and simplify your life!
From Device Encryption to FileVault
If you used Device Encryption (or BitLocker) to encrypt your data on Windows, you’ll probably want the same level of protection on your Mac. And if you haven’t taken advantage of disk encryption before, now’s the time to start, because macOS makes it very easy!
macOS encrypts data with a tool called FileVault. When you use FileVault, all data on your startup disk is protected with strong encryption. That means that even if someone has physical access to your Mac, they still won’t be able to get at that data — it will just be unreadable gibberish without your password. For this reason, FileVault is one of the most important macOS security features you can use.
To turn on FileVault, go to Apple menu > System Preferences > Security & Privacy > FileVault. Click Turn On FileVault to — you guessed it — turn on FileVault! You’ll be asked to choose a recovery method. For most users, we’d recommend just going with iCloud backup instead of creating a standalone recovery key.
As long as you’re not on battery, your Mac will now start encrypting everything on that startup disk in the background. If you have a lot of data on your Mac, this can take a while the very first time you do it. But once FileVault is enabled, subsequent encryption will be much faster.
Understanding macOS security prompts
If you’re a longtime Windows user, you’re probably very used to seeing security prompts. The macOS security features built into your Mac will produce security prompts as well.
We’ll talk about a few of these here, but first, a word of caution: Take these prompts seriously! Unfortunately, many Mac users simply click through macOS security prompts without reading them — and as a result, some unlucky individuals end up infecting themselves with malware.
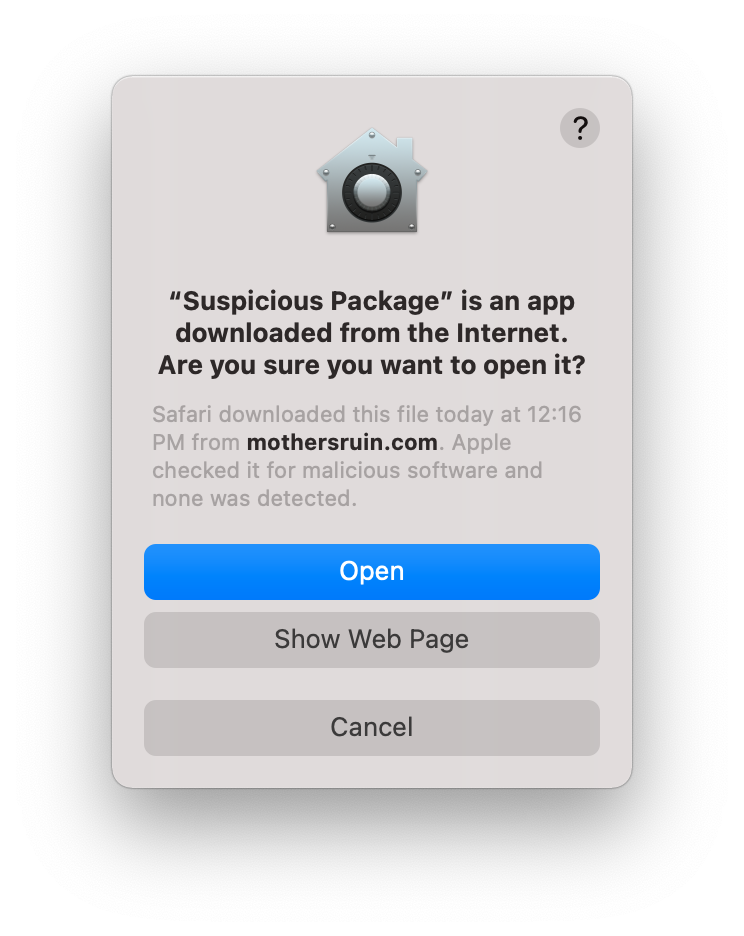
File Quarantine prompts
File Quarantine dialogs let you know when you’re about to launch an app from the Internet. If you’ve just installed a third-party macOS app (even a legitimate one), you’ll see one of these dialogs when you first open the app. The important thing to note here is that these dialogs alert you to the fact that an app is being launched. Bad actors sometimes try to disguise their malware as a “harmless” file type like a PDF or a .txt file. So if you try to open up what you think is a PDF, and your Mac asks you if you really want to launch an app, be careful — something isn’t right!
Gatekeeper prompts
Gatekeeper checks apps for code signing issues. If there’s something wrong with an app’s code signing, you’ll see a notification telling you that Apple can’t verify the developer. If you see this notification, don’t open the app.
Note that if you don’t see a warning, you still can’t be 100% certain that the app is safe. In the past, bad guys have managed to obtain valid Apple Developer credentials to sign their malware! That’s why it’s important to only use third-party apps from developers you know and trust.
App Notarization prompts
App Notarization is an automated process by which Apple checks apps for indications of malware. Like other macOS security features, App Notarization is not perfect. But it does provide some level of assurance that an app is free of malicious code. If an app hasn’t passed the notarization process, your Mac will tell you that the app couldn’t be scanned for malware, and won’t let you open it.
Note that there are workarounds that allow you to open apps that haven’t been signed, or that can’t be checked for malicious code. However, we would strongly recommend against this unless you know exactly what you’re doing. Bad actors sometimes offer detailed instructions on how to use such workarounds to bypass macOS security features — allowing them to sneak malware onto a Mac. This is essentially a form of social engineering that can lead to a full system compromise.
Microsoft Defender vs XProtect
You’re no doubt familiar with Microsoft Defender, the built-in antivirus protection for Windows.
macOS has a built-in security tool called XProtect. However, unlike Microsoft Defender — which is an increasingly robust and full-featured anti-malware tool — XProtect has significant limitations.
For one thing, it’s only intended to provide a basic level of protection against known malware variants on macOS. XProtect has been receiving more frequent updates in recent years, but it still can’t compete with dedicated anti-malware tools. Third-party apps are backed by malware research teams. Their sole job is to find and define new Mac malware variants as they emerge. XProtect, in contrast, tends to update its definitions after a new malware threat has become public knowledge. And unfortunately, this may not be fast enough to protect all users.
In addition, XProtect is somewhat weak on malicious programs that fall into a “gray area” in terms of harm: things like Potentially Unwanted Programs (PUPs), adware, and keyloggers. These sorts of threats may not be “high priority” for Apple’s security teams, but they’re definitely not anything most people would want on their computers!
For this reason, it’s a good idea for all Mac users to install a reputable, regularly updated anti-malware tool.
Learning More
In general, Macs are intuitive, easy-to-use computers. But they are a bit different from Windows machines. And understanding how they work is the best way to set yourself up for security and privacy.
Check out these resources to learn more about your Mac:
- A guide to the differences between macOS and Windows privacy settings
- The Checklist, a podcast about digital security and privacy aimed at Mac users
- How to use a Mac to make encrypted iMessage backups for your iPhone