Sophos Anti-Virus for Mac Home Edition Review
Review: Sophos Anti-Virus for Mac OS X
Posted: November 8th, 2010
Author: Israel Torres
Introduction
Sophos declares the following in their campaign for Sophos Anti-Virus for Mac Home Edition:
Malware myth: Macs can’t get viruses.
SophosLabs have detected over 1,000 threats for Mac OS.
Sophos Anti-Virus for Mac Home Edition runs in the background and scans files for threats whenever your Mac opens them. It comes with an uninstaller (Applications/Remove Sophos) in case you want to remove it after trying it on your system.
I’ll be going through this review step-by-step and cover all the features related to the Mac system, usability, configuration and overall experience. Feel free to follow my journey.
 Note: It is very important to be sure to backup your system with Time Machine or alternative back up software prior to installation and after verifying you have the requirements necessary to install and run adequately.
Review Version
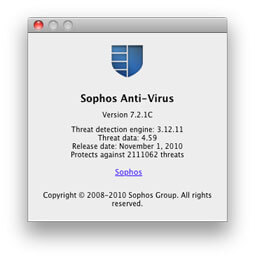
Version: 7.2.1C
Threat detection engine: 3.12.11
Threat data: 4.59
Release date: November 1, 2010
Protects against 2111062 threats
Installation
Prior to even downloading the downloadable installation check over the Tech Specs page to verify that your system is up to par with what the software supports. The requirements are pretty simple as it works with Intel/PPC processors from Tiger to Snow Leopard on all Apple Mac hardware (including the latest Macbook Air released last month).
After downloading the Sophos Anti-Virus for Mac DMG (filename: savosx_72_he.dmg size:~62 MB) it is highly recommended that you invoke Terminal, change to your Downloads folder and generate the message digest using the command md5 savosx_72_he.dmg and match the checksum on the Sophos Tech Specs site (at the time of this writing) it is 21c3c6f2d93d0843238b9575792e06ef if the checksums do not match it is possible that the DMG corrupted during download, has been tampered with, or someone dropped the ball on synching the download page to the file. A quick tweet to http://twitter.com/sophossupport could help fix that although no guarantees.
Once you’ve verified the checksum you may proceed with the installation. The DMG auto mounts (labled as “Sophos Anti-Virus Home Edition OS X 10.4+”) on a default Mac system and opens a window with a two step process.
The first is to to check the link labeled “Before You Install.html” which redirects you to the Sophos Anti-Virus for Mac Home Edition FreeTalk / MacTalk User Forum where you can read through issues other users may be having ahead of time as well as system-wide announcements that may affect the version you are using on your system. Sometimes if you notice a lot of users complaining about issues like their systems slowing down because of something you have in common there may be discovered work-arounds you can ready yourself for or in the end decide not to run the product installation. Please do this step as it can save you hours of headaches and time rebuilding your system if the installation or software won’t work for you no matter what you do. You never know how lucky you are until your number comes up 🙂
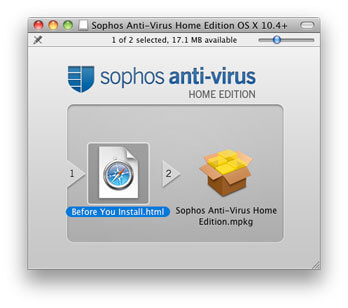
Once you’re satisfied by putting in some research time and sanity checks you can move to the second step of clicking on “Sophos Anti-Virus Home Edition.mpkg” (Meta Package File). You will be walked through the Sophos End-User License Agreement for Consumers (EULA) and will have to agree to their licensing terms before proceeding. To keep your anti-virus protection up to date, the installer will connect (via the Internet) to Sophos and configure anti-virus updates. The Standard Install will take approximately 182 MB of hard disk space. At this time you have the option to change the installation location as well as further customize however the Custom Install identical to the Standard Install as you can’t check or uncheck additional options at this time.
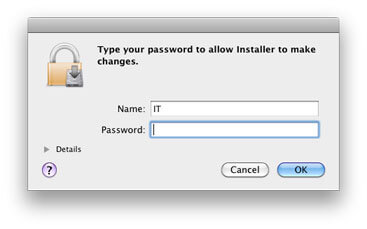
Clicking continue will prompt for your administrator password. If you don’t have one or don’t recall setting one up for your Mac don’t worry just click OK to continue. (It’s unwise to have a blank password for your Mac but that’s another article…) During the installation Sophos Anti-Virus for Mac requires your Administrator password in order to install system components only accessible by the Administrator of the Mac system.
Once the installation is successfully complete you can close and drag the image to the trash or right click and eject the image.
At this time you can verify that the Black Shield is now on your menu bar by where the time is displayed.
![]()
The Black Shield
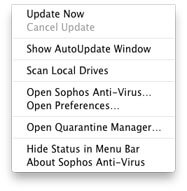
The Sophos Anti-Virus for Mac Home Edition Black Shield icon has 9 clickable selections as follows in the respective top down order.
1) Update Now : This checks for the latest update files.
2) Cancel Update : This cancels the update in progress.
3) Show AutoUpdate Window : This displays the status of your updates.
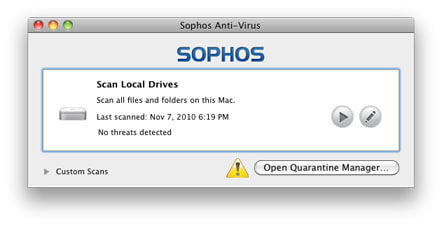
4) Scan Local Drives : This invokes the application to scan local drives.
5) Open Sophos Anti-Virus… : This invokes the application.
6) Open Preferences… : This customizes the behavior of the software.
7)Open Quarantine Manager… : This opens the Quarantine Manager to review and act.
8) Hide Status in Menu Bar : This hides the Black Shield from the menu bar.
9) About Sophos Anti-Virus : This displays the version, engine, data, threat information.
 Note: When Sophos Anti-Virus for Mac is running the Black Shield icon on the right side of the menu bar. To access the Quarantine Manager click the Black Shield and choose Open Quarantine Manager. To check for viruses manually click the Black Shield and select Scan Local Drives.
The Dock Icon
If you end up hiding the Black Shield and want to get it back you can use Finder to navigate to Applications and click on the Sophos Anti-Virus application (which is a blue shield) this will load a blue shield on your dock where you can right click to see similar items seen using the Black Shield as follows:
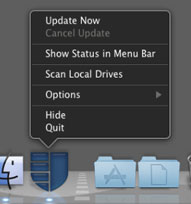 1) Update Now : This checks for the latest update files.
2) Cancel Update : This cancels the update in progress.
3) Show Status in Menu Bar : This brings the Black Shield back to your menu bar.
4) Scan Local Drives : This invokes the application to scan local drives.
Options : This is standard Mac OS (Keep in Dock, Open at Login, Show in Finder).
Hide : This is standard Mac OS and hides the application.
Quit : This is standard Mac OS and quits the application.
Sopho’s Anti-Virus Mac
 When a threat is detected the blue shield icon appends an exclamation icon on top of the shield to further notify the user something has been detected.
Post-Installation and Preferences
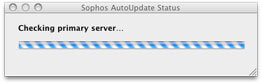
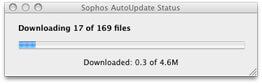
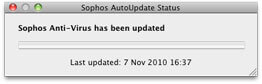
So you’ve got it installed what next? As a safety precaution I’d always recommend to run the Update Now selection under the Black Shield. The first time I ran it the AutoUpdate Status window showed that I was downloading 169 update files at about 5MB total. Upon completion it stated that Sophos Anti-virus has been updated with a date and time stamp.
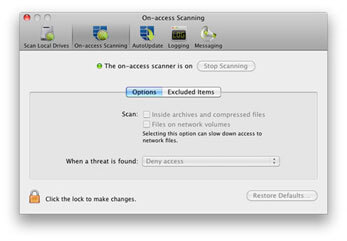
After updating your system go through the preferences. The defaults should suffice but be aware that when a threat it is found it will only log the threat. You’ll have to open preferences and change that from Log only to Clean up threat, Move threat, Delete threat. Obviously it only logs threats not to mistakenly delete something that is vital to the system continuing operation while you decide the next step. Sometimes malware overwrites areas that when removed can cause the system to become unstable so be careful.

Scanning inside archived and compressed files will affect the speed and operation of your system which is why the check box is available to disable this feature. If you have a lot of .zip files (.tar, .rar, .sitx, etc) and after you complete a first time full system scan you may either want to disable this feature or make an exception for those files. A lot of malware authors are aware of these types of scanners and usually encrypt the archives to where they require a password usually sent over email to open the file to get a user to manually open and execute it without worry about it being cleaned during transit.
In the preferences you can choose granular details as the scanner is running on your system such as the inside of archives and compressed files – it’s one thing to do it at will expecting to slow down your system and another thing for it to be constantly running opening files that it most likely doesn’t – which is resource intensive and may reflect a detrimental change in performance to your system. You’ll need to tweak these settings to whatever you feel most comfortable with. You can always restore to defaults if you don’t remember what it was set at so play away. To make changes you’ll need to use your Administrative password again (the same one you used during the installation – if you had one – otherwise just click OK on the prompt to continue). Another resource hog will be scanning files all the time that aren’t local to your machine; again great for a one time overnight bulk scan but not so great all the time 24/7 over your network. Your network performance will degrade and your game playing will become chunky.
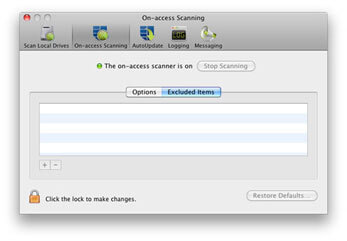
You get an exclusion area where you can add directories you don’t want scanned either because they are large in size; or have research work with known malware; or just things you don’t want scanned period. Just click the + symbol and navigate to the directory or file and click Open to be added to the exclusion list. (I think I found a bug playing with the exclusion list after trying to remove a directory; but feel free to give it a try).
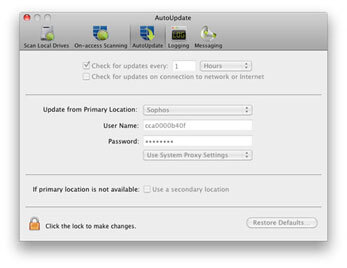
AutoUpdate allows you to check for updates for an arbitrary period/cycle of time and from where. For this version I noticed the Update from Primary Location is locked into Sophos with User Name: cca0000b40f and a password (perhaps arbitrarily generated since there was no official registration process or perhaps just one ring to rule them all). I didn’t drop WireShark to see the authentication process but chances are it is SSL (one can hope). This may change in the future I assume since these options appear to be disabled for now but available to view. Same goes for the secondary location option.
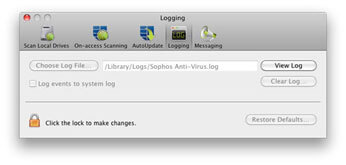
The logging preference allows you to select a location, view the log, clear the log (but not save the log) with the option to log the events to the Mac’s system log.
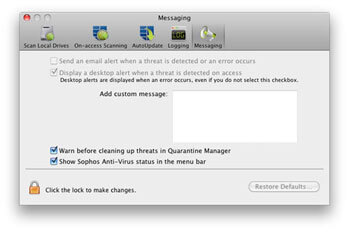
Lastly there is a messaging preference which allows the system to send an email alert when a threat is detected or an error occurs as well as display a desktop alert with an option for a custom message like “get out of the building you have 20 seconds!”. There is also a warning option in case you aren’t sure you want to really clean threats in the Quarantine Manager – sometimes you want to save these to send to the technicians if they ask you for it. The last check box is the status of the Anti-Virus operations in the menu bar.
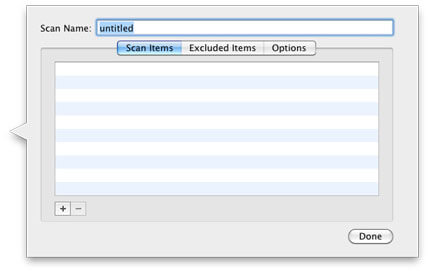
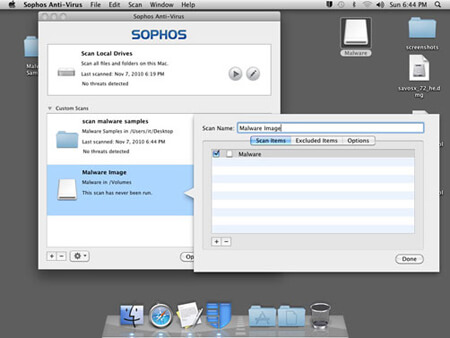
Creating a custom scan is simple but not entirely clear at first so we’ll go over it here.
With Sophos Anti-Virus open click File and select New. This will create a new entry labeled with the default “untitled”. Here you can drop files, folders into either Scan Items, Excluded Items, and specify Options such as scanning and logging. It also states in the main window the threat status, folder/file location, and date/time last scanned. Here you can further edit and scan at will.
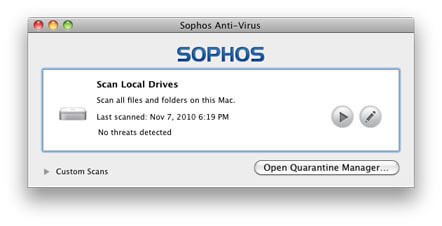
After reviewing and confirming the preferences you can run your first local scan. These usually take a while so it is a great thing to do overnight while you aren’t using the machine. The drive I’m using is 160GB with only 6.53GB being used (Standard Mac OSX Snow Leopard installation minus the Apps and updated to the latest and greatest) took about 45 minutes from start to finish. The progress counter counts backwards for items remaining to be scanned which I personally think is way better than some weird math time based calculation that is rarely accurate.
Note: Threats found are moved to the Quarantine Manager for further review and removal.
This test machine has an encrypted DMG with malware samples that I plan to test with in the next section and it was not detected as a threat (as mentioned above).
Lab
In this section I removed the network cable from the test Mac mini and removed all USB devices. Please do not try this at home.
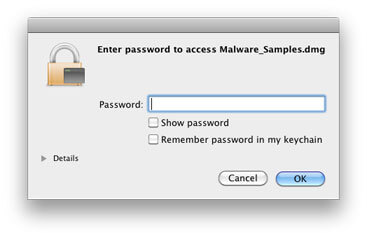
I have a DMG with “live” malware samples and will attempt to open it while the system is scanning in the background.
The DMG auto-mounted just fine after I entered the password – and did not trigger the scanner as a threat.
In the mounted image I selected the Malware Samples folder and attempted to drag the folder out to the Desktop
Almost instantly Sophos Anti-Virus popped up an exclamation window with a blue shield (Figure.26) stating “Threat detected by Sophos Anti-Virus” : “Virus/Spyware” Troj/KoobDL-A has been detected and listed in Quarantine Manager.
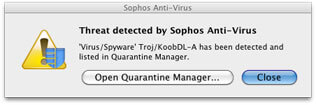
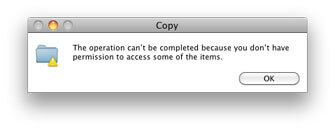
There is a prompt to open the Quarantine Manager or Close the the popup. I also got a copy error; but that could be related to something else or the operating system stopping it from occurring.
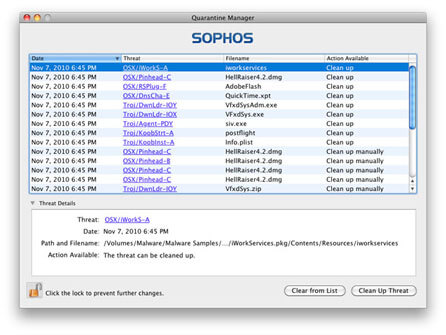
 I open the Quarantine Manager and in the Threat Details where it states Action Available it states further: “The threat cannot be cleaned up. Please cick the threat name above for manual cleanup instructions” – An interesting thing here is even though it stated Troj/KoobDL-A in the initial message it only shows Troj/Boonana-A in the Quarantine Manager Pane
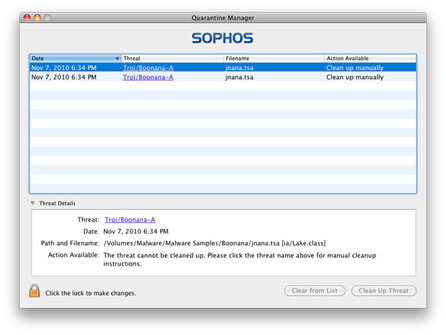
Clicking on the Web Link redirects to http://savmac7-20.p.link.sophos.com/t/en/Troj%2FBoonana-A but since I disconnected my ethernet cable prior there is a message in Safari stating that I am not connected to the Internet.
In Sophos Anti-Virus under File/New I created a custom scan called “scan malware samples” and drag-dropped the Malware Samples folder and it stated no threats detected. Checking the folder it looks like the operation killed the copy.
To be more persistent I created another custom scan called Malware Image and dropped the auto mounted image into the pane and ran the scan.To be more persistent I created another custom scan called Malware Image and dropped the auto mounted image into the pane and ran the scan.
Much more like it this time it detected 24 threats!
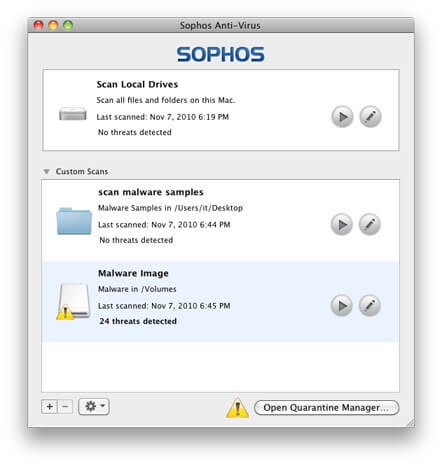
I was able to see them all in the Quarantine manager and some offered cleanup while others did not.
Note: Testing was not done on Windows malware as it is beyond the scope of this Mac article.
Uninstallation
Even though the idea of something is better than nothing is usually sound Sophos Anti-Virus for Mac Home Edition has an uninstaller that is installed with the application if you no longer want it on your system. This is nice because a lot of applications just are thrown into the trash and leave residual artifacts scattered over the system with erroneous log files, plists, etc.
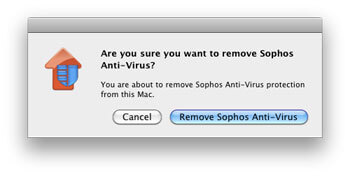
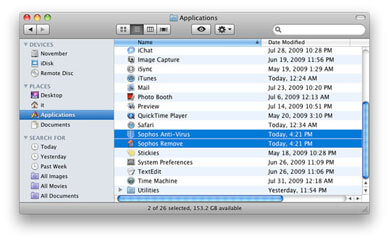
To Uninstall use finder and navigate to Applications and if you are sorted alphabetically by Name you’ll find the App called Sophos Remove right under Sophos Anti-Virus. Clicking it brings up a little house icon with a blue shield on it and the following prompt: “Are you sure you want to remove Sophos Anti-Virus?” : “You are about to remove Sophos Anti-Virus protection from this Mac.” with two options Cancel and Remove Sophos Anti-Virus set to default. As in the installation the uninstallation requires your Administrator password to continue. Enter it or just press OK if you don’t have one.
A status window states that the software is being removed from your system and lasts less then a minute and you are given the confirmation text that “Sophos Anti-Virus has been removed from your Mac.”

Additionally both Sophos Application icons are no longer in the Applications folder.
GUI
All in all the Graphical User Interface and Mac feel is spot on. This application is very intuitive and easy to use. From installation to usage, alerting, customization to uninstallation I think most Mac users would feel comfortable using Sophos Anti-Virus for Mac Home Edition.
I really enjoyed using the custom scan feature to create different scan preferences for files and folders; and it keeps track of the last time it was scanned.
The Quarantine Manager was at the perfect level of explaining to the common user which threat was detected and what it meant and how they could go about fixing it or deleting it from their system.
Support FAQ
Support options for Sophos Anti-Virus for Mac include their MacTalk forum and their support documentation; which include 4 how-to videos for installing, scanning, and cleaning threats; a technical guide, installation guide and FAQ page. There is no phone or email support available since the product is free.
This level of support is perfect for Mac users that know what they are doing and don’t require hand holding. Chances are if something doesn’t go as expected you are doing it wrong.
Thoughts and Conclusion
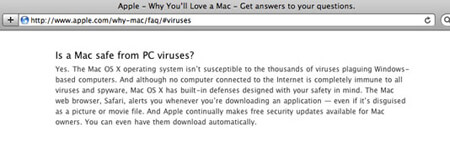
While it would be politically correct to use the word attacker instead of hacker in their own overview of the product it is among the few free Mac-based malware tools bringing more awareness and understanding of the vulnerabilities to come to it’s user base whether they like it or not. Apple only recently changed it’s marketing that Macs don’t get viruses to Macs don’t get PC viruses (since logically PC-based applications won’t run on Macs anyway).
One of the things I noticed is that it doesn’t keep track of items already scanned. I found this out by accidentally stopping a scan (using Scan Local Drives) after the half-way point and starting the scan again. In a perfect world it would have resumed from where it left off instead of starting from the beginning.
But you know what it’s free (at least for now at the time of this review); however Sophos Anti-Virus for Mac Home Edition is certainly more than what is expected from free applications. It’s certainly more comprehensive, updatable, customizable and user friendly than the built-in Mac Anti-Malware feature ( just don’t tell Jobs I told you that 😉
The key points that Sophos advertises are as follows:
- Free.
- Easy to install.
- Runs quiet with minimal messages.
- Resource conscious.
- Keeps you safe.
- Cleans Mac or Windows threats.
- Stops unknown threats
- Customizable scans.
… and writing this review was quite the pleasure as it exactly met those needs.
Rating
I’ve run a handful of malware scanners in the past (I don’t refer to them anymore as anti-virus/spyware/etcware… since it all breaks down to malware anyway) and for the price it is hands down a 5/5 across the board.
On the Web
Further information, links mentioned and free download available at the following link:
http://www.sophos.com/products/free-tools/free-mac-anti-virus/
Links and Resources
Sophos Homepage: http://www.sophos.com
Sophos Anti-Virus for Mac Home Edition: http://www.sophos.com/products/free-tools/free-mac-anti-virus/?utm_source=Magnet&utm_medium=Cross-link&utm_campaign=M-CL-Sitepromo